
Arduino Nano
https://www.arduino.cc/en/Main/Software
The Arduino Nano is a very small and very cheap (about $2,- on e-bay) development board with an Atmel 328P processor. It has a bootloader on board and is very easy programmable with the Arduino IDE.
For all kinds of hardware there are a lot of Libraries available on the Internet. The Arduino language is also very strong in special functions and they are very easy to use. I2C and SPI are standard communication interfaces.
At this moment I made already a lot of small projects, in first instance to test the many different TFT and LCD displays which are available on e-bay (see my page about that).
GPS Receiver
https://learn.adafruit.com/adafruit-ultimate-gps-featherwing/arduino-library
https://bintray.com/olikraus/u8glib/Arduino
Downloads:Software ![]()
Update version 2.0: Added 12/24 hour and Timezone settings.
In line 26 and 30, the 12/24 hour and Time zone setting can be made respectively.
Update version 2.1: Repaired East-West determination error in QRA locator.
Note about the OLED display resolution: From builders I understand that the default resolution in the Adafruit SSD1306 library is set to an incorrect value. You must change the resolution in the Adafruit_SSD1306.h file to 128×64. It is a #define statement at the beginning of the file.
Because of the very cheap available GPS units I started building a compact GPS receiver with OLED display.
I used the GPS library from Adafruit and a fast working graphical library from Oliver Kraus.
You will find the connections between Nano, GPS and OLED in the sketch.
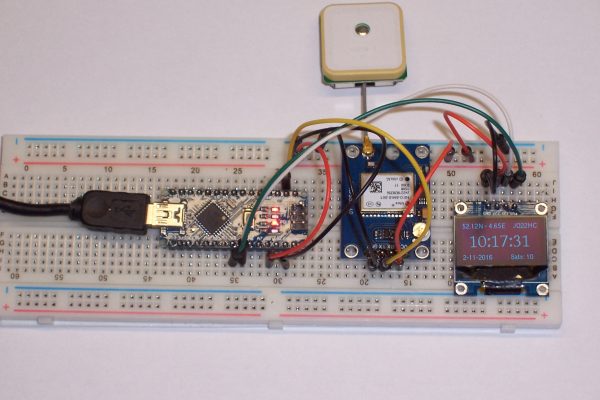
GPS Receiver on breadboard
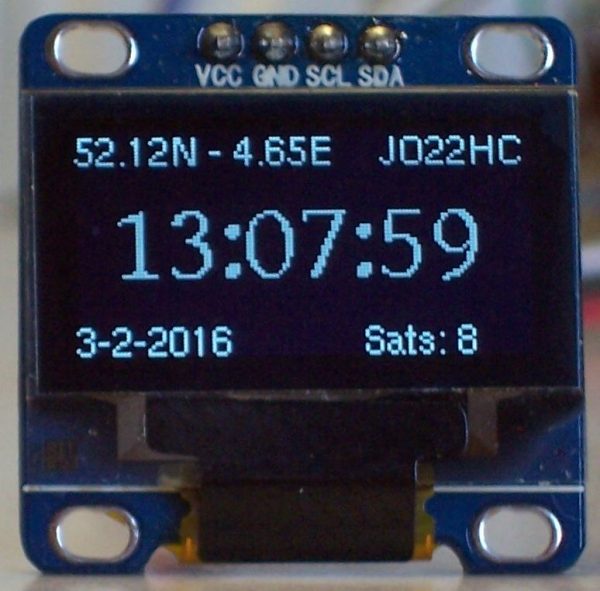
GPS Receiver
I2C Scanner
Downloads: Software
Note about the OLED display resolution: From builders I understand that the default resolution in the Adafruit SSD1306 library is set to an incorrect value. You must change the resolution in the Adafruit_SSD1306.h file to 128×64. It is a #define statement at the beginning of the file.
To find the right I2C address of an I2C device I made a program that displays on an OLED the I2C address of connected device(s).
I added an OLED display to the original sketch of Nick Gammon.
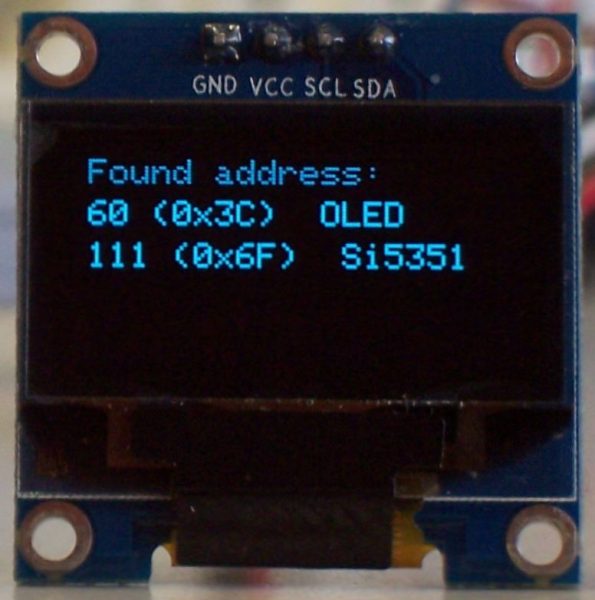
I2C Scanner
WB7FHC CW Decoder
Downloads: Software
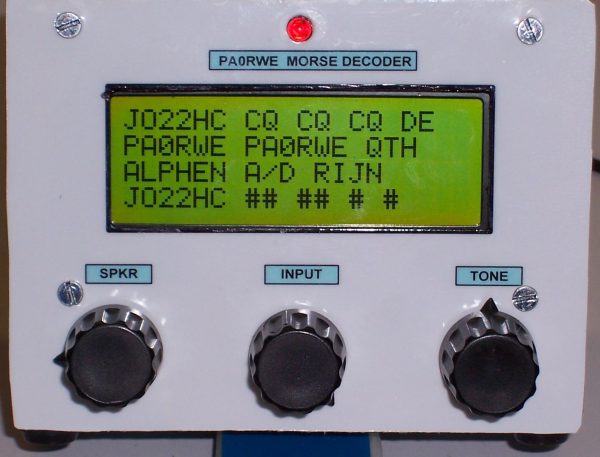
In the VERON magazine of November 2015 there was a description of a CW Morse decoder built around an Arduino Nano. I liked the project and built it in a home made enclosure made from PCB. I tested it with an Arduino program called ‘cw_foxhunt’ which you can find here.
The program worked fine but the Tone tune was very small. I found that the range was from 800-3300 Hz which I find to large. So a changed the resistor in series with the 22K potmeter from 3K3 to 10K. After that, the frequency range was from 580-1200 Hz, much more in common to a CW signal.
Added to the decoder was a key function with a 4060 side-tone generator and a LM386N amplifier. The schematic (made by Joost, PE1RCD) can be downloaded here.
For easy use I added a electret microphone and mount it in the back of the enclosure. With a switch I can select the mike or the ‘normal’ input. See new picture of backside view.
The schematic was found on internet. See: http://www.instructables.com/id/Pre-amp-to-electret-mic/ Place the box in front of the Rx speaker and go with it!
Below some pictures of my decoder.
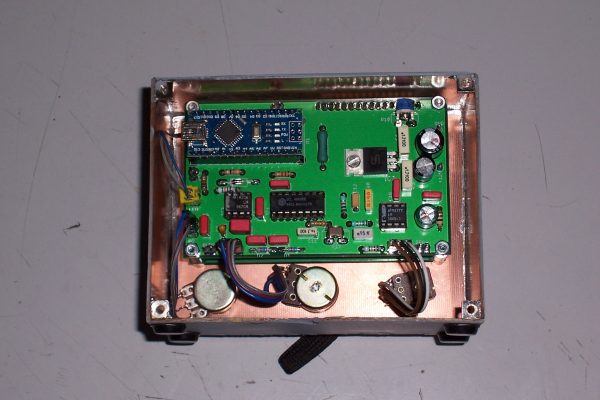
Inside view
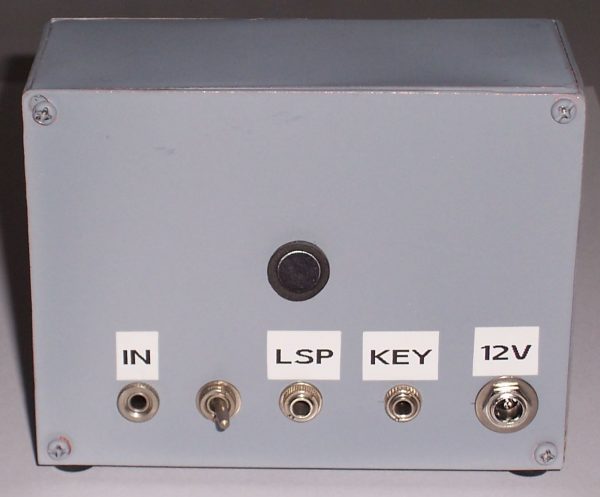
Decoder backside view with electret microphone